Taking your Joomla! website offline
In this tutorial you will learn how to take your newly installed Joomla! website offline so you can work on it without it being publicly visible. Once you have installed your new Joomla! web site it is time to make changes to it. You will want to take it offline while you are completing this. Here is how:
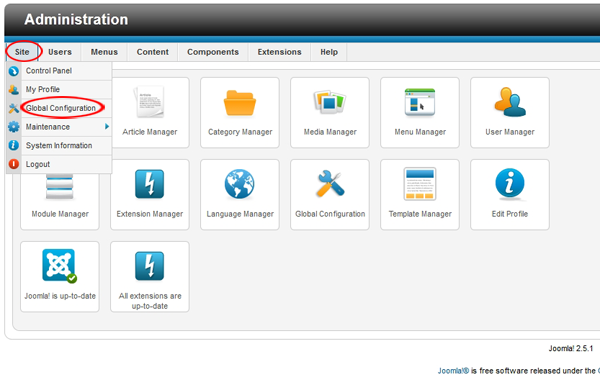
Step 1. Visit yourdomain.com/administrator. If you uploaded Joomla! into a sub-directory you would visit http://yourdomain.com/mysubdirectory/administrator. Be sure the domain name corresponds to the domain name you own and is hosted on your hosting account. Log in using your admin username and password you had set up during installation. 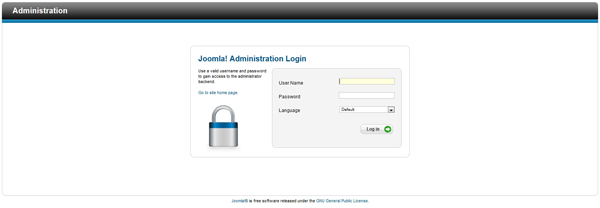 Step 2. Once logged in, you will see the main administration panel in the back-end of your website. Select “Site” from the main navigation bar and then select Global Configuration from the drop down menu.
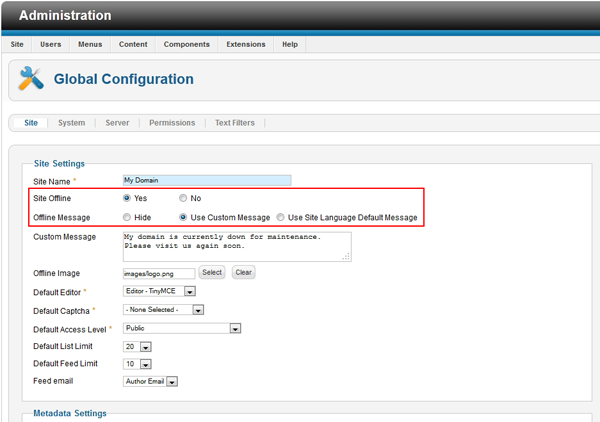
Step 3. Now select “Yes” for the option “Site Offline”. Make sure “Use Custom Message” is selected for “Offline Message”.
Step 4. Next to the option “Custom Message” add your custom text that visitors will see when they visit your web site while it is offline.
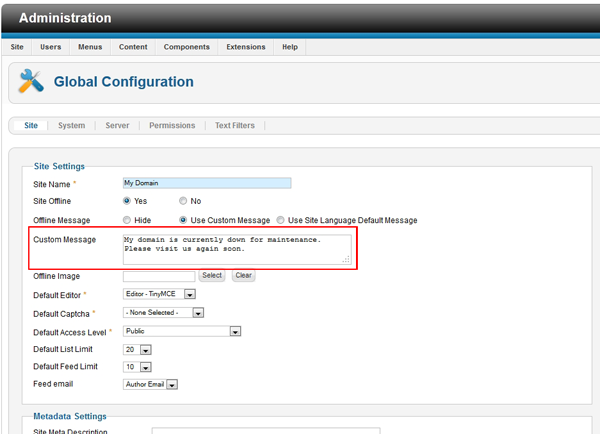
Type Custom Offline Message
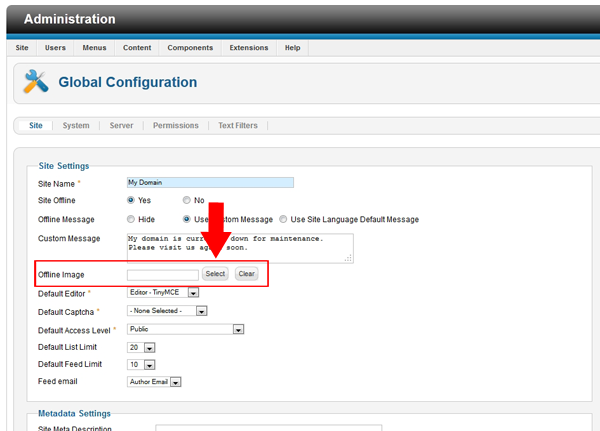
Step 5. If you would like to add your company logo click select next to the option “Offline Image”.
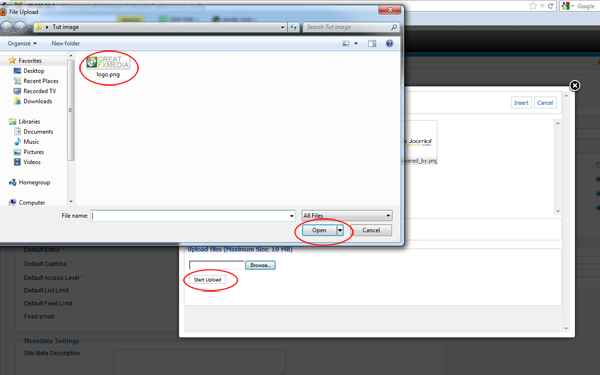
Step 6. The media manager window will open. Select “Browse”.
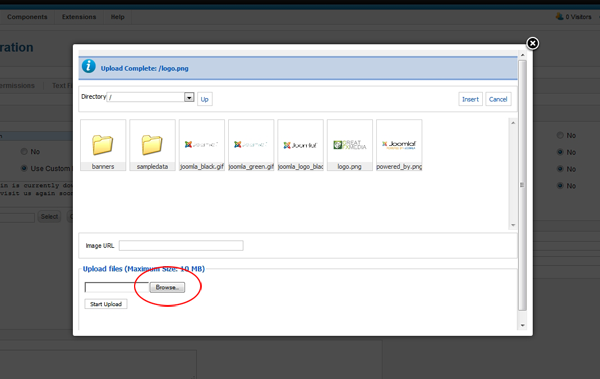
Step 7. Find your custom image on your local computer. Click on the image and select “Open”. Select “Start Upload”.
Step 8. You can now see your logo in the media manager. Select the image in the Media Manager and select “Insert”.
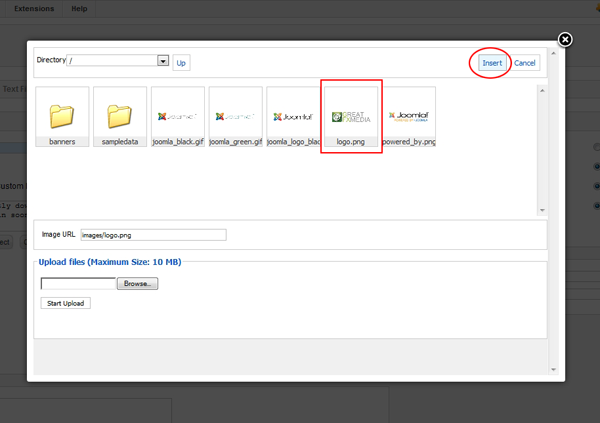
Select image uploaded in previous step
Step 9. The media manager will close. Click “Save” in the top right hand icon set.
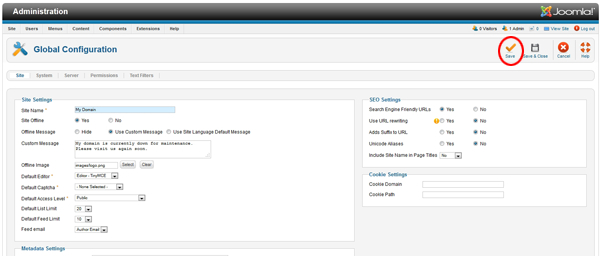
Click save in upper right hand corner
Step 10. Visit http://mydomain.com and you should see your offline message with your logo and a log in form.
To proceed customizing your newly installed Joomla! website just log in using your administrator username and password. You will now be able to view your website.


